No-Bake Cherry Jubilee
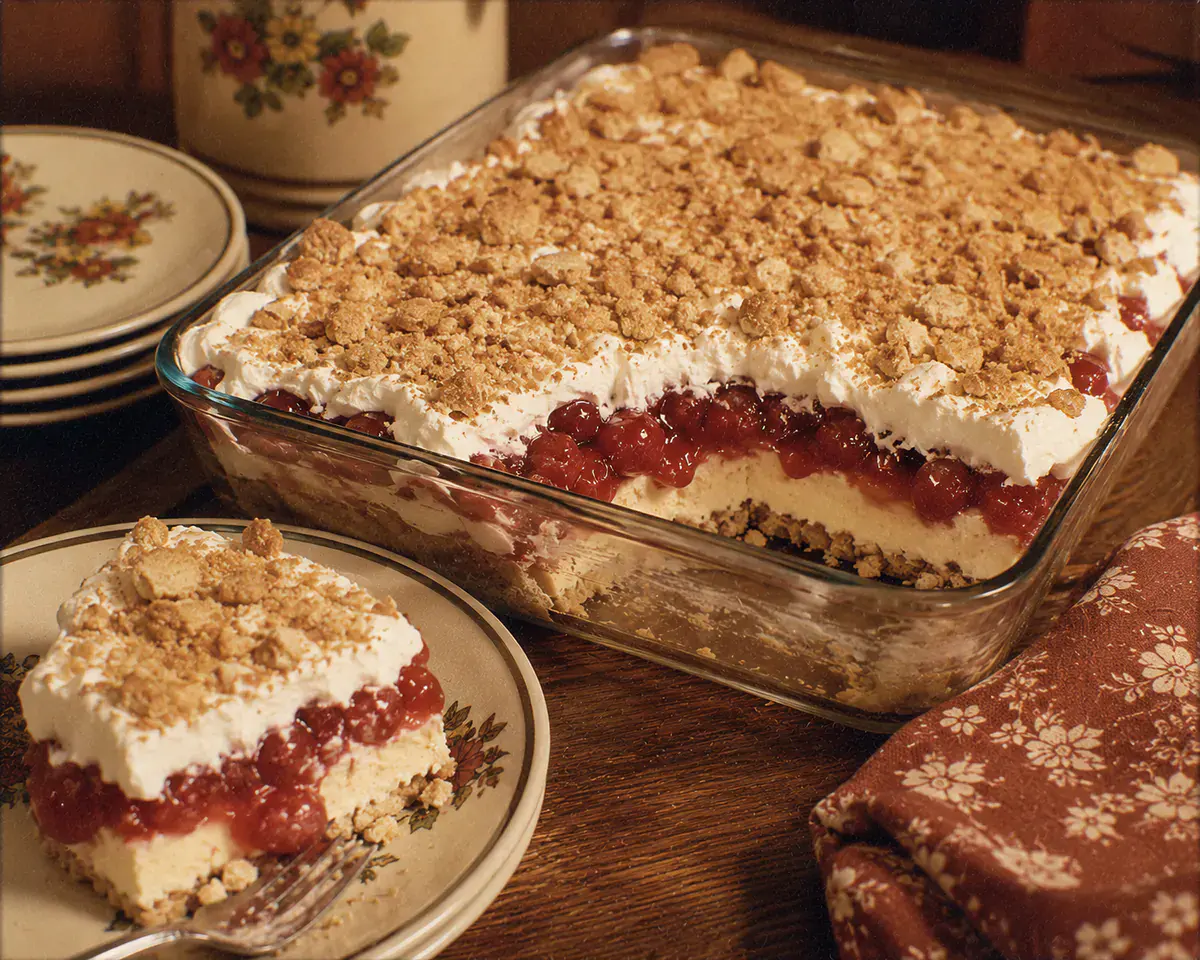
The wafer crumbs gradually soften against a fluffy filling as this old-fashioned dessert chills. Cherries gleam through the cool layers, which cut into creamy squares the next day.
Recipe link
Prep time20 min
Cook time0 min
Total time4 hr 20 min
- Course
- Dessert
- Cuisine
- Granny's Recipes
- Difficulty
- Easy
- Est. calories / serving
- 340
Ingredients
Cream Filling
- ½ cup butter — softened but not melted
- 1 ½ cups powdered sugar
- 2 pasteurized large eggs
Crumb Layers
- 8 oz vanilla wafers — finely crushed
Cherry Layer
- 1 can cherry pie filling — 21 oz
Whipped Topping
- 1 container whipped topping (8 oz, about 3 cups), thawed — 8 oz, about 3 cups; thawed
Instructions
- Prepare the Cream Filling: In a large bowl, use an electric mixer to beat the softened butter on medium speed for about 1 minute, until creamy. Add the powdered sugar and beat on medium-high speed for 2 to 3 minutes, scraping down the bowl once, until very light and fluffy. Add the pasteurized eggs one at a time, beating for about 1 minute after each addition, until the filling is pale, smooth, and fluffy enough to hold soft ridges.½ cup butter, 1 ½ cups powdered sugar, 2 pasteurized large eggs
- Build the Bottom Layer: Spread half of the crushed vanilla wafers evenly into the bottom of a 9x13-inch or slightly smaller baking dish. Press lightly to level the crumbs without compacting them into a hard crust.4 oz vanilla wafer crumbs
- Add the Cream Layer: Place small dollops of the butter filling across the crumb layer. Use a spatula to spread the filling gently and evenly to the edges, taking care not to pull the crumbs into the filling.
- Add the Cherry Layer: Spoon the cherry pie filling evenly across the cream layer, spreading the cherries and sauce into the corners.21 oz cherry pie filling
- Top with Whipped Topping: Gently spread the thawed whipped topping evenly over the cherries without pressing it down into the cherry layer.8 oz whipped topping
- Finish the Dessert: Sprinkle the remaining vanilla wafer crumbs evenly across the whipped topping.4 oz vanilla wafer crumbs
- Chill: Cover the baking dish tightly and refrigerate for at least 4 hours or preferably overnight, until completely cold and the layers hold together when cut. Serve chilled.
Notes
- Pasteurized Eggs: Because the cream filling is not cooked, use pasteurized shell eggs or the package-equivalent amount of pasteurized whole egg product.
- Chilling: Overnight chilling gives the dessert its best texture as the crumbs soften and the layers settle together.
- Cream Filling: Use softened but not melted butter, add the eggs one at a time, and beat thoroughly so the filling stays light and fluffy.
- Vanilla Wafers: Mostly fine crumbs spread and soften most evenly, while a few small pieces give the topping a little texture.
- Pan Size: A 9x13-inch dish produces thinner traditional layers. A slightly smaller dish creates thicker, richer layers throughout the dessert.
- Make Ahead and Storage: Prepare the dessert up to 1 day ahead. Store it tightly covered in the refrigerator for up to 3 days, and return it to the refrigerator within 2 hours of serving.
- Serving Suggestions: Serve well chilled after Lemon Chicken with Layered Summer Salad and Molasses Corn Bread with Orange Butter.
Nutrition (Approximate Per Serving)
Yield
12 servings — Serving size: About 1 square
- Calories
- 340
- Carbohydrates
- 47 g
- Protein
- 2.5 g
- Fat
- 16.5 g
- Saturated Fat
- 10 g
- Cholesterol
- 50 mg
- Sodium
- 90 mg
- Fiber
- 0.6 g
- Total Sugars
- 36.5 g
Equipment
- Baking dish (9x13-inch or slightly smaller.)
- Mixing bowls
- Electric mixer
- Spatula
- Food processor (A rolling pin may be used instead to crush the wafers.)
- Plastic wrap or tight-fitting lid
- Refrigerator